Wednesday, October 14, 2009

Tres Leche

DSC02340As many of you know Monica and I are baking our way through Martha Stewart’s Cupcake book. This month’s cupcake choice fell to me and I chose the Tres Leche cupcakes. (Go check out Monica’s little beauties!)

Hmmm, where do I start. I’m trying really hard to be objective but the truth is I wasn’t totally thrilled with these. Martha, me and you can’t be friends if your recipes aren’t working for me!

DSC02339

I wound up making these twice. The first time I halved the recipe and my cupcakes came out hard and rubbery. Okay, no problem perhaps my calculations and measurements were off. I gave Monica a call to see how hers turned and after finding out they were fine I decided to give the recipe another go.

DSC02348

With my second try I decided to make the whole recipe but only bake 6 cupcakes and use the rest of the batter to bake an 8 inch cake. This time around I made certain to beat my egg whites until they were almost stiff (Hi, Donna !!) and they held up when I added the rest of the ingredients. I gave Monica another call and after exchanging notes and photos it appeared that everything went well this time. DSC02329

Except for making a cake along with the cupcakes my only change to the recipe was to slowly pour the milk mixture over the cupcakes and cake instead of brushing it on. I stored the unfrosted cupcakes and cake in the fridge over night so they could hopefully soaking up the last of the milk mixture. I frosted them the following evening with cinnamon whipped cream (I followed Monica’s suggestion and added the cinnamon to the whipped cream. YUM!!) though they never completely soaked up the tres leche mixture.

We ate the cupcakes the night after I baked them and they were surprisingly good. The boys even liked them so much DSC02358they asked if there would be more for tomorrow. I told them yes as I still had the cake. The cake; now the cake is a whole other story. It was a disappointment. The bottom of the cake never really soaked in the tres leche mixture and the top, it soaked in too much and was soggy. If you’ll take a good look you can see in the bottom photo a line on the top edge (which is actually the bottom as I flipped out the cake to frost and serve it.) which was a rubbery hard eggy “crust”.

DSC02367

Would I make this again? Yes, just probably not this recipe and at this point I’m not even sure Martha and me can continue our friendship. I’ve made 5 recipes out of Martha’s cupcake book and three out of the five have been a disappointment. Could it be me? Possibly but I’d like to think not as it seem to only have trouble with her (cupcake) recipes. If your looking for the recipe you better mosey on over to Monica's and I’m not even going to suggest buying the book. The majority of the recipes can be found online.

DSC02371

***************************************************

Check out this post and be sure to tell me what’s your favorite fall recipe and kitchen gadget to win one of my favorite gadgets.

Sunday, October 4, 2009

Snickerdoodle Blossoms

These are  the first “cookies” I’ve made in YEARS if you don’t count the pizzookies. They are most likely the closest thing to cookies you’ll see on here, too.  While I like cookies they aren’t my favorite which is probably why I think they are a lot of work for just a little payoff.  

DSC01864

I first lusted after these beauties when I saw them on Monica's blog but it was seeing Denise's version of them, baked up in a mini muffin pan that gave me the final push to make them.  I suppose with my love of all things snickerdoodle-y, it isn’t a huge surprise that this would be the “cookie” to get me out of my “no cookie baking” funk.   :)

DSC01865

I know a few of you (April & Megan) are already thinking about what you are going to put on your holiday cookie tray this year and I think these should be considered.  They really aren’t difficult and they are VERY good!

DSC01873 

Snickerdoodle Blossoms 

  • 1/2 cup granulated sugar
  • 1/2 cup firmly packed brown sugar
  • 1 cup butter, softened
  • 1 egg
  • 1 teaspoon vanilla extract
  • 1/4 teaspoon salt
  • 2 cups all-purpose flour
  • 1 teaspoon baking soda
  • 1/4 cup sugar
  • 1 tablespoon ground cinnamon
  • 48 milk chocolate candy kisses, unwrapped

Heat oven to 375°F.

Combine the 1/2 cup sugar, brown sugar and butter in large mixer bowl. Beat at medium speed until creamy. Add egg, vanilla extract and salt; continue beating until well mixed. Reduce speed to low; add flour and baking soda. Beat until well mixed.

Shape dough into 1-inch balls. If dough is too soft, cover and refrigerate 30 minutes to 1 hour. (Don’t be lazy like me, refrigerate the dough! It makes it much easier to work with!!)Combine the 1/4 cup sugar and ground cinnamon in a small bowl. (On the 2nd batch I mixed some turbinado sugar with cinnamon and rolled the dough in it. I loved the crunch it added.) Roll dough balls in cinnamon sugar mixture.

Place 2 inches apart onto ungreased cookie sheets.* Bake for 8 to 10 minutes or until very lightly golden brown. Immediately press 1 chocolate kiss in center of each cookie and sprinkle remaining cinnamon sugar over them while they're still warm. (Duh, I forgot to sprinkle my 1st batch but did the 2nd.  In case you’re wondering the 2nd batch tasted better!) Remove from cookie sheets; cool completely on a wire rack.

Makes 4 or 5 dozen.

DSC01862*Instead of the cookie sheets I put the rolled dough into a Pam sprayed mini muffin pan.  I won’t tell you how long I baked mine as I didn’t do a very good of job rolling my dough into a 1 inch size or even getting them all the same size.  I also like my cookies very soft so I took them out as soon as they looked done to me.   I think you’d be fine using Monica’s bake time for the regular cookies.

*********************************************************

If you haven’t checked out this post you’ll miss out on a chance to win your own handy dandy Microplane nutmeg grater!

Tuesday, September 29, 2009

Mini Triple Layer Banana Cake & Finding the Yummiest Cream Cheese Frosting

DSC02112 I made this cake four or five weeks ago when I promised my sitter, Miss Karolyn that I’d make cream cheese frosting (this was the fave) for her mom who was baking 100 banana cupcakes for a baby shower.  Her mom, Beth wasn’t sure what cream cheese frosting tasted like so, I decided to use my brown speckled bananas to bake a  few cupcakes and top them cream cheese frosting for her to try.  I only baked 6 cupcakes and  used the rest of the batter to make a mini three layer cake and three mini bundt cakes (My bundt cakes stuck to the pan, so no photos.).   I also used this opportunity  to try out two new recipes.  I used this lovely layered banana cake recipe and its cream cheese frosting recipe which I found on the blog, Evil Shenanigans.

DSC02133

The cake was great the first day and even better I thought the second.  The frosting on the other hand was good but not great.  Miss Karolyn’s mom who I passed along all the cupcakes to liked both the cupcake and the frosting but I thought I could do better with frosting. 

DSC02122When Miss Karolyn had first asked about the frosting I called my blogging buddy Monica to ask her opinion about how many cups of frosting I would need and to see if she had a recipe to recommend.  She did and I should have listened up and made it from the get go.  I didn’t but luckily I talked to her again and she convinced my I needed her recipe a try.  Oh, my goodness!  It is hands down the yummiest cream cheese frosting I have ever had.  My only issue with it and every cream cheese frosting I’ve ever made is that it doesn’t hold it’s shape or at least mine doesn’t.  It  gets so soft.  Yes, I added powered sugar, as much as I could without over doing it.   Is there some secret I’m missing?  Help! 

DSC02124

Vanilla Bean Frosting from Cupcake Bakeshop

  • 2 sticks (1 cup) unsalted butter, room temperature
  • 1 package (8 ounces) cream cheese
  • 2 teaspoons vanilla extract (I only added a splash as I used  vanilla bean paste)
  • 1/2 vanilla bean, seeds scraped out (I used 1Tbs vanilla bean paste)
  • 4-5 cups powdered sugar (I used 5 cups)

Using an electric mixer, beat the butter at medium speed until creamy. Add the cream cheese and beat until combined. Then add the vanilla extract, vanilla seeds, and 3 cups of powdered sugar and beat at low speed, occasionally stopping to scrape the sides and bottom of the bowl, until light and fluffy. Add more powdered sugar to arrive at the consistency and sweetness you like.

Makes enough to frost 24 cupcakes.

DSC02127

***************************************************

Thanks everyone for all your get well wishes.

If you like fun kitchen gadgets check out this post for a chance to win your own Microplane nutmeg grater.

Sunday, September 27, 2009

A Little Thank You with a Touch of Fall

DSC02311

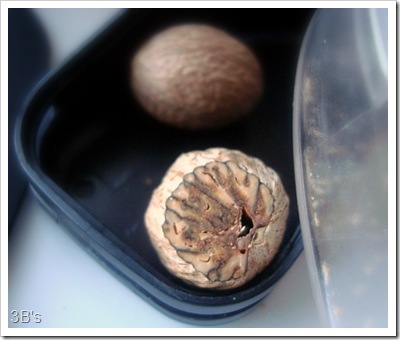
The official start of Fall was just the other day and while it’s still hotter than Hades here (FL) I know some of you are already enjoying cooler weather.  With the Fall season underway many of you are breaking out those Fall spices such as cinnamon, nutmeg, and cloves.  Those of you who have read my blog for awhile  know cinnamon and nutmeg are spices that I happily use all year long.  While I don’t grate my own cinnamon I do grate nutmeg as I need it.  I use this handy dandy gadget by Microplane and I love it.  You can definitely see and smell the difference between the ground bottled stuff and the freshly grated. 

DSC02317

As a little thank you for bearing with me and my sporadic posting and commenting I wanna give you the chance to win your own handy dandy nutmeg grater.  Along with the grater I’m going to send you a bottle of nutmeg AND cinnamon sticks.  Why stop with nutmeg, right?!  The only thing you have to do to win is leave a comment telling me what’s your favorite gadget and fall dessert.  When leaving your comment don’t forget to include a way for me to get a hold of you.  Unfortunately, I’m not certain what rules there are when shipping “food/spice” overseas so this giveaway will have to be for those in the continental US. Sorry! 

Technorati Tags:

Thursday, September 24, 2009

Out Sick....

Okay, so things finally slow down this week and don't you know I've been sick the past few days! Just my luck. :(

Saturday, September 19, 2009

Cinnamon Caramel Popcorn with Pecans & White Chocolate Drizzle!

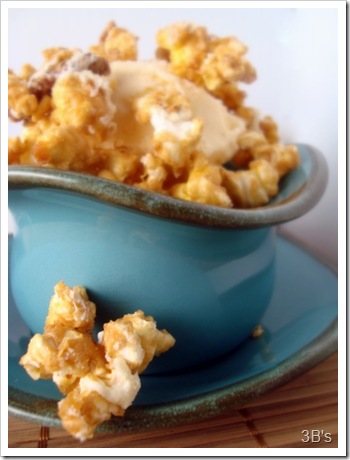
Is that not a mouthful or what, but boy was it good!  On Wednesday my buddy, Michelle from One Ordinary Day made some cinnamon popcorn that she claimed was quick, easy, and delish!  DSC02276Unfortunately as quick and easy as it may have been the kids’  homework and studying this week has left no time for baking. Lucky for me the next afternoon I found this recipe, for cinnamon caramel popcorn with pecans and white chocolate on Our Best Bites.  Was it coincidence?  I think not! Sara’s recipe even had the pecans and white chocolate I thought of adding to Michelle’s.  Fate and a break in homework had me making a batch of this last night. 

DSC02274

I only made one change to this most delectable popcorn and that was to use Ghirardelli white chocolate bars instead of the almond bark.  While incredibly good the next time I make this and there will be a next time, I am going to change things up.  These changes are to satisfy MY taste and  not necessarily yours.  My first change will be to double the pecans added and leave them in bigger pieces.  My second change is a biggie.  Next time I’m not going to bake it, at all!  Both the twins and I agreed that it was equally if not more yummy with the caramel mixture still sticky and warm just poured over the popcorn and pecans. Because I’m not baking it I’ll toast my pecans before adding them.  The last change is again, one of personal preference but I’d leave out the white chocolate drizzle.  I don’t think it needed it.  The bites that had white chocolate seemed too sweet.  I just noticed that Sara changed her recipe and left out the salt (1/4 tsp) but I think the popcorn benefits from the salt (sea) and could probably stand another 1/4 tsp of it to cut through the richness of the caramel. 

DSC02273

Cinnamon Caramel Corn with Pecans                      & White Chocolate            Recipe by Our Best Bites

12 C popped popcorn (about 1/2 C kernels)
1 C pecan halves, roughly chopped
1 C brown sugar
3/4 t cinnamon
1/4 C karo syrup (or honey makes a good substitution)
1 stick real butter (1/2 C)
1 tsp vanilla
1/2 tsp baking soda
3 squares almond bark (about 4 oz)

Preheat oven to 250 degrees
Place popcorn and chopped pecans in a large bowl and set aside.
Combine brown sugar, cinnamon, and salt in a 4 C capacity microwave safe bowl.  Mix well.  Chop butter into chunks and place on top of sugar mixture.  Pour corn syrup over the top of everything.  Microwave on high for 30 seconds and then stir to combine.  Return to microwave and heat for 2 minutes.  Remove and stir and then microwave for 2 minutes more.
Remove from microwave and add in vanilla and baking soda.  Stir to combine.  Mixture will foam and rise.  Pour caramel mixture over popcorn and pecans and stir very well so everything is well coated. 
Spread popcorn mixture onto a foil-lined jelly roll pan.  Place in oven and bake for 30 minutes, stirring every 10 minutes. 
Remove from oven and spread out on a large piece of parchment, waxed paper, or foil.
Melt almond bark according to package instructions.  Drizzle over popcorn mixture.  When almond bark is hardened and popcorn is cool, break into chunks and enjoy!  (I might have topped some vanilla ice cream with the last of the it! :))
DSC02286

Here’s Michelle’s recipe for cinnamon popcorn. 

Cinnamon Popcorn

  • 8-10 c. of popped popcorn
  • 1/2 c. unsalted butter, cut into pieces
  • 1/3 c. granulated sugar
  • 1 1/2 tsp. cinnamon
  • 1/2 tsp. vanilla extract
  • 2 hefty pinches of kosher salt

Preheat oven to 300 degrees.  Pop popcorn and spread onto a large cookie sheet.  (Michelle used a hot air popcorn popper.)  Melt butter, sugar, and cinnamon in a microwave-safe bowl until sugar is dissolved and butter melted, 1 – 2 minutes.  Stir in vanilla extract.  Spoon butter mixture over popcorn and sprinkle with salt.  Toss to coat as many pieces of popcorn as you can.  Place in oven for 10 minutes.  Allow to cool completely.  If storing {not likely!}, place in an airtight container

**Speaking of Michelle she participating in Cupcake Hero this month and created the very delicious looking (& I’m certain tasty) Banana S’mores Cupcakes.  I haven’t made them yet but they are at the top of my “to make” list.  Check them out and if you think they are as delish looking as I do you can vote for her here!    Go Michelle!  :)

*******************************************************

Over the last six months or so I’ve received several blog “awards”.  I want to take a moment to thank all of you for thinking of me and my blog.  I know that the “award” rules say I need to chose 5, 6, 7, or 10 other bloggers to pass them along to but if you’ve been reading my blog awhile you’ll know how I feel about calling out a select few.  ALL of you have a unique voice and something special about your blogs.  I apologize if  my not passing along the awards offends anyone but there it is.  Thanks, again and I’m sorry it took me so long to say it!

DSC02288

Wednesday, September 16, 2009

Marshmallow “Not So” Frosted Brownies

In keeping with the marshmallow theme of my last post here’s some marshmallow frosted brownies I made.  This is actually the third time I’ve made these brownies though the first time I’ve tasted them myself.  The very first time I made them was last school year for one of Devon’s classes.  They must have been a hit because his teacher asked for them again the following week.  After the second batch I told his teacher that I preferred to bake and try different recipes so, no more marshmallow frosted brownies.  I know you guys know what I mean.  :)

DSC02171

This last batch I baked was intended for Babygirl’s cheerleading squad but due to rain, practice was cancelled and they never made it.  Initially I was annoyed. This was the second time I had baked something for her to bring but didn’t get to because thunderstorms forced practice to be cancelled.  I did say initially.  After tasting one I was more than pleased with both the brownies and the fact that I now had a pan full.  Miss Karolyn, the children’s sitter enjoyed them as well.  To keep from gorging myself I gave a third of the pan to her to take to home.  

DSC02166

I found this recipe at Mommy’s Kitchen.  Tina, the bloggess of Mommy’s Kitchen is a HUGE fan of Paula Deen and has tried many of her recipes which means she has a blog full of yummy food!

DSC02168

For the most part I followed Tina's recipe with the exception of being generous with the ‘mallows.   On this last batch though I did goof up a bit.  As you can see my brownies are not really frosted.  This was due to impatience.  I hurriedly made the glaze and then poured it, still HOT on to my just out of the oven, marshmallow topped brownies.  I know that the recipe says to but you don’t really want  the frosting boiling hot so much as really warm.  It also didn’t help that the marshmallows hadn’t gotten that crunchy skin on them that they get after being roasted and then coming to room temp. (read, I needed to let the brownies cool and didn’t read the recipe carefully.) They weren’t so pretty but it all worked out. The frosting seeped into the brownies making them so moist and yummy.  If you want  marshmallow “frosted” brownies you should probably follow the recipe a little better than I did this time around.  Oh, and Tina says to follow the box directions for cakey brownies….I say no, if we’re gonna go marshmallows and frosting, then it’s fudgy all the way!

DSC02167

Marshmallow Brownies
1 - (9 x13) boxed brownie mix
Miniature marshmallows
Frosting (recipe below)

Make the brownie mix according to package directions for CAKE LIKE brownies. Bake according to package directions. When brownies are done, cover them with a layer of miniature marshmallows and put back into the oven for a few minutes until marshmallows are nice and puffy. Cool brownies and top with frosting recipe below.

Frosting
1/2 cup butter
4 tablespoons unsweetened cocoa powder
3 tablespoons milk
3 tablespoons water
3 1/2 cups confectioners' sugar
1 teaspoon vanilla extract

Bring 1/2 cup butter or margarine, 4 tablespoons cocoa, 3 tablespoons water, and 3 tablespoons milk to a boil. Remove from heat. While still hot, add confectioners' sugar, and vanilla. Beat well. Pour frosting over brownies while frosting is still hot. Allow to cool before cutting.


Technorati Tags: ,

Saturday, September 12, 2009

Cookies & Cream Rice Krispy Treats

I made these cookies and cream rice krispy treats treats last Sunday for Devon and three of his DSC02241football buddies that were coming over for dinner and to spend the night. To say that the boys liked the treats would be a huge understatement.  They tore into them and had eaten all but four of the treats by the following morning.  I know you’re thinking well, it was four boys but they didn’t start eating the treats until after 8:30pm and they also each had a piece (or two) of the ice cream cake I made!  (That post soon to come.)

DSC02238

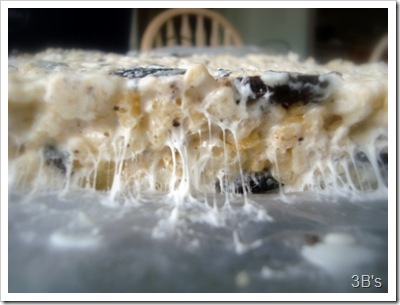
While I didn’t follow her recipe I did take inspiration fromDSC02237 Culinary Concoctions by Peabody.  I initially was going to give it to you but instead I’m just going to tell you to check out your Rice Krispies box.  The one thing I do differently when making rice krispy treats is I always increase the amount of marshmallows.  Marshmallows are what makes the treats so yummy, be generous.  For this batch I added another half a bag of marshmallows and about two rows of oreo cookies that I cut into quarters.   I didn’t want a strong chocolaty flavor and  I wanted to have oreo cookie chunks so I was careful not to add any of the oreo crumbs.

DSC02233

Do you like oreos?  Do you like rice krispy treats? Then I recommend giving this a try and if you are super keen on chocolate, up the oreos, add the crumbs, and use Cocoa Krispies.  For all of Sunday and Monday I was “d’man”!  All three of the boys went home talking about my cookies and cream rice krispy treats!  One of the boys even went so far as to hide one of the treats so he could bring it home for his parents to try.  :)

DSC02236