Wednesday, July 22, 2009

A Tale of Two (Mini) Cheesecakes.

The story starts off like this41NSB26523L__SL500_AA280_…. for Mother’s Day, Daddy, my father that  lives in New York sent me a Mother’s Day card along with a check to buy myself a gift.  With that no guilt money I bought this mini cheesecake pan which I had been lusting over for sometime.  (btw, it’s now even cheaper!)  I’m happy to say that I actually used it the very same day I received it in the mail.  Wondering what recipe to make and excitedly opening the package I found a cheesecake recipe printed right on the side box.  Not only was it a recipe made to use with this particular pan it turned out to be a very good recipe.  The recipe came together very quickly and with no trouble at all.  The most troublesome part is the waiting.  Wait for the cream cheese to soften.  Wait for the cheesecakes to chill. 

DSC01728

NorPro Mini Cheesecakes

Ingredients

  • 1 (12 oz) package of vanilla wafers or favorite cookie (I used oreos)
  • 2 (8 oz) packages of cream cheese, softened
  • 3/4 C. white sugar
  • 2 eggs, room temp
  • 1 1/2 tsp vanilla extract (I also added a splash of almond & didn’t quite add the full amt of vanilla)

Directions

Preheat oven to 35o.  Lightly grease tins.  Crush cookies (I added a couple of TB of melted butter to help in bind it together.) and even place crushed cookies into each tin.  In a mixing bowl, beat cream cheese, sugar, eggs and vanilla until light and fluffy.  Fill each tin with the cream cheese mixture, almost to the top.  Bake for 15 mins.  Cool.  (The recipe does not say anything about chilling it in the fridge for a few hours but that’s kind of a no brainer.) 


Jumping forward to few weeks ago, I saw these mini cookies and cream cheesecakes on DSC02911-1Bake or Break. Unknowingly at the very same time I spied them, Monica at Lick the Bowl Good had as well.  During the course of the week Monica and I found out that we each had intentions of baking said cheesecakes that coming weekend.  Without really verbalizing it we decided to bake these “together”.  She actually made hers earlier in the weekend and sent me along an email with some tips and I with her helpful tips in mind made my minis on Sunday night.  Please, go and hop over to check hers out.  Her photos are stellar and I know they’ll do the recipe justice.   Monica has also been very patiently waiting for me to get my butt in gear and post this!DSC02901-1

Cookies and Cream Mini Cheesecakes **

  • 42 Oreos, 30 left whole and 12 coarsely chopped
  • 2 pounds cream cheese, softened
  • 1 cup granulated sugar
  • 1 teaspoon vanilla extract
  • 4 large eggs, lightly beaten
  • 1 cup sour cream
  • pinch of salt

Preheat oven to 275°. Line standard muffin pans with liners. Place 1 whole cookie in the bottom of each liner.

Beat cream cheese at medium speed using an electric mixer. Gradually sugar, beating until combined. Beat in vanilla.

Drizzle in eggs, a bit at a time. Beat in sour cream and salt. Stir in chopped cookies.

Divide batter among pans. Bake for about 22 minutes or until filling is set.

Cool completely on wire racks. Refrigerate 4 hours or overnight. Remove from pans just before serving.

Makes 30 cheesecakes

**The only change I made was to use my mini cheesecake pan along with my muffin pan.  With the smaller pan I adjusted the bake time and watched closely for that just set look. I ended up with twelve mini cheesecakes and six standard muffin size ones.  In an email to me Monica mentioned that her cheesecakes shrunk a bit and suggested filling the batter to the top as opposed to 3/4 of the way.  I filled mine to the tippy tippy top and had no incidents of shrinkage with either pan.

This tale isn’t over as I foresee more mini cheesecakes in my future and I’m going to try using my pan for other desserts as well. 

*Note>>>Miss Karolyn took the photos of my oreo cheesecakes.

Technorati Tags: ,

Sunday, July 12, 2009

Just the Ganache Please

DSC01805 This isn’t about the brownies though they were very good.  This is about the ganache that I topped the brownies with.  Now this isn’t any ordinary ganache.  Not your run of the mill ganache.  No, ma’am! This is a finger licking, last drop getting peanut butter chocolate ganache!  Do you see where I’m going with this?  It was insanely good. 

DSC01811

For me the ganache was the perfect balance of peanut butter and chocolate.  It was so silky and smooth when I poured it over the brownies.  I don’t know if it was because the brownies were not long out of the oven but the wonderful aroma of chocolate and peanut butter was intoxicating.  I know I’m going on and on but think about it. I don’t even really like peanut butter or chocolate.  I generally avoid the two unless they’re together.  Together they’re better, good even and sometimes like with this ganache, they’re magical!

DSC01816

Peanut Butter Chocolate Ganache Recipe

Ingredients You Will Need: (I only made half the recipe)
1 cup heavy cream
1 ½ cups chocolate chip morsels (I used a combination of Ghirardelli semi-sweet & dark)
4 tablespoons unsalted butter
¾ cup powdered sugar
½ cup smooth peanut butter

In a small saucepan, combine the cream, powdered sugar, chocolate chip morsels and butter over low heat. Bring to a boil, reduce heat and add the peanut butter at the same time. Stir until smooth.

Ganache will be too hot to spread or pour. Set in the refrigerator for several minutes. Then place the ganache on the counter and stir once or twice over the next ten minutes until it has reached the desired consistency.  (I was in a hurry so I didn’t follow this step completely.)DSC01823

The brownies were for a BBQ that my neighbor across the street was having.  They started with a box mix.  I’m not certain which but I added some Reese’s mini baking cups.  From the photo you can see how they sunk to the bottom.  I hate that.  Luckily I had the peanut butter chocolate ganache to consol myself with.

* Here are some photos of the Twins playing baseball at Cooperstown.  These were my faves!  Jalen’s pitching and Devon’s batting.

IMG_0679 IMG_0681 IMG_0682 IMG_0683 IMG_0684 IMG_0685 IMG_0686

IMG_0595 IMG_0596 IMG_0597 IMG_0598IMG_0599 

Thursday, July 9, 2009

Easy Oreo Cake

I saw this easy Oreo Cake a couple of months ago on Dine and Dish and immediately thought of my Dad, Larry.  DSC01749I baked and served it to him the Friday my parents came into town for Father’s Day from NC.  My Dad loved it all but the rest of us had varying opinions.  I personally loved the filling and thought the ganache went well with the cake.  The cake itself while extremely moist and tender was chocolate and as most of you know I’m not a fan nor are my children.  My Mom on the other hand said the cake and filling were great but didn’t care for the ganache which she thought was not sweet enough.

DSC01752

Now I have  to tell you a funny story.  The following day on the request of my mom I took the left over cake to my aunt’s house where a bunch of us were meeting for an impromptu luncheon.  On the way there I had to pick up  the Twins from my brother’s house. Well, when Devon hopped into the car and saw the left over cake he was appalled.  He right away asked me, “Mom, what are you thinking?!  You can’t bring a half eaten cake to a “party”!”  I explained that it was okay but he still thought it odd. He’s a funny kid.

DSC01753

Let me tell you, that half eaten cake was quickly gobbled down and the only negative comment said was that there wasn’t enough for (everyone to have) seconds. My Aunt Toni whose house I was visiting doesn’t generally like sweets and she requested a second slice so she could save it for later! 

Chocolate Covered Oreo Cookie Cake

*This is the recipe as found on Dine and Dish but I’ll be honest, the ingredient list doesn’t make a lot of sense to me.  You see in step #1 it says to “Prepare and bake cake mix in two (9-inch) round cake pans as directed on package”.   I read the backs of both Betty Crocker’s and Duncan Hines’ mixes and the amount of eggs, oil, and water called for on the packages are not the same as the amounts listed in the recipe. Or is it just me that doesn’t get it? If it is me you’re gonna have to break it down for me ‘cause I’ve read and re-read this several times.  My alterations are noted in (red).

1½ hours | 20 min prep

SERVES 16

  • 1 (18 ounce) package devil’s food cake mix
  • 1/4 cup oil (1/2 C. which was the amt the box called for)
  • 2 eggs (3 eggs which was the amt the box called for)
  • (1/3 C. of water, the recipe did not call for any water but the box did)
  • (1 C. of buttermilk, the box actually called for 1 1/3 C. of water but I substituted the buttermilk for part of it)
  • 4 Baker’s semi-sweet chocolate baking squares
  • 1/4 cup butter, cut up
  • 1 (8 ounce) package Philadelphia cream cheese, softened
  • 1/2 cup sugar
  • 2 cups thawed Cool Whip
  • 12 Oreo cookies, coarsely crushed
  1. PREHEAT oven to 350°F Prepare and bake cake mix in two (9-inch) round cake pans as directed on package. Cool in pans 5 minute Invert onto wire racks; remove pans. Cool layers completely.
  2. PLACE chocolate and butter in small microwaveable bowl. Microwave on HIGH 2 minute or until butter is melted. Stir until chocolate is completely melted. Cool 5 minute
  3. BEAT cream cheese and sugar in large bowl with electric mixer on medium speed until well blended. Add the whipped topping and cookie crumbs; mix lightly. Place 1 of the cake layers, top-side down, on serving plate; spread with the cream cheese mixture. Cover with the remaining cake layer, top-side up. Spoon glaze over top of cake. Let stand until set. Store in refrigerator.

DSC01757

Saturday, July 4, 2009

Happy 4th of July!

I hope everyone has a Happy and Safe Independence Day!

~ingrid

Technorati Tags:

Wednesday, July 1, 2009

Raspberry Cream Cheese Buns

I made these the weekend of Mother's Day for my raspberry lovin' Mom who was visiting that weekend from NC. Whenever I see raspberries they make me think of my mom.  So it was a given that these would make an appearance during her visit home after I had seen them on Bake or Break.

DSC01599-1

Both my Mom and Dad loved these!  I thought they were very good as well but I might have gone a little overboard with the jam, dolloping a few more times than the recipe stated to.  :)

Raspberry Cream Cheese Buns

Recipe from The Buttercup Bake Shop Cookbook.

  • 1 cup + 3/4 cup all-purpose flour
  • 1 teaspoon baking soda
  • 1/2 teaspoon baking powder
  • 1/4 teaspoon salt
  • 8 ounces cream cheese, softened
  • 1/2 cup unsalted butter, softened
  • 1 cup granulated sugar
  • 2 large eggs, at room temperature
  • 1/2 teaspoon vanilla extract
  • 1/4 cup milk
  • 1/4 to 1/3 cup raspberry preserves

Preheat oven to 350°. Grease and flour a large (1-cup capacity) 12-cup muffin tin.*

Combine 1 cup flour, baking soda, baking powder, and salt.

Beat cream cheese, butter, and sugar on low speed of an electric mixer until fluffy, about 2-3 minutes. Beat in eggs, one at a time. Mix in vanilla. Add dry ingredients, alternating with milk. Add remaining 3/4 cup flour and mix until combined.

Spoon batter into muffin cups. Top with 3 small dollops of preserves and swirl into the batter using a small knife.

Bake for 20-25 minutes,* or until a pick inserted into the center comes out clean. Do not overbake.

Makes 12 buns.*

*For regular sized muffin tins, decrease baking time by 2-3 minutes. Makes about 20 buns. (I made 18 and had just a wee bit of batter left over.)

DSC01597-1

Don’t ask me why I didn’t pop out one of the buns and take a photo of it and its yummy jam filled belly.  :(

Katie from Salt and Chocolate made a blueberry version of these.

Technorati Tags: ,,

Thursday, June 25, 2009

Does this look like your cake?

DSC01360 I made this cake one afternoon and was very surprised at how lovely it was.  It was  light, fluffy, and delicately moist but here’s my dilemma I don't know who to give credit for it.  I know I didn't find it on one of my regular haunts and I've lost my print out of the recipe.  I want to say that the words sour cream were in the name but when I googled sour cream coffee cake a gazillion links pop up.  I can’t remember if the recipe called for cinnamon sugar to be sprinkled on top or if that was my own addition and I know I cut back on the chocolate chips.  I baked mine in 3 mini loaf pans and 1 small ramekin.

DSC01358

Please, if this looks or sounds like your cake by all means speak up.  I think it has tremendous potential and would like to make it again with a few tweaks. Instead of chocolate chips ( I cut back on those the first time) I'd love to add in some cinnamon ones and toasted nuts are always a wonderful addition. By the way you should know that your recipe doesn't specify when to add the butter.  Luckily I saw it on the counter just before I poured the batter into my pans.  I admit my first thought was uh,oh, I goofed but no, I read and re-read the recipe, you left it out. I went ahead and added it in, fortunately it was very soft and mixed in fine. So, please, if you recognize this cake let know and can I have the recipe? (Abby, I need to try the coffee cake you raved about!)

DSC01373

Note:  I made this almost two months ago so this photos are quite as nice as my more recent ones.  I’d like to think I’m improving! :) 

Here’s a little of the first “B”, baseball!  My brother Joseph (in the white shirt) took most of these photos of the Twins.  Devon is #4 and Jalen is #13.  The other man in the photos is Papi, my father.

Recently Updated

coop1

Thursday, June 18, 2009

Banana Caramel Cake

DSC01674 Yes! It tastes as good as it sounds!  Better really!  This is another one of those recipes that was so good I made it twice within a two week period.  As a matter of fact I bought bananas that were past their prime so I could make this again.  As I’m typing this the photos are taunting me.  I had no intentions of baking tonight but find myself  eyeing up the the bananas on the counter and checking out the clock. 

DSC01677 I have to tell you. This is my favorite banana cake.  All of the ones I’ve made (except this one) to date I have been very good but for me, this is it.  While I won’t stop trying other recipe this is the one I’ll turn to when there’s bananas that need using up and no new recipe to try.

DSC01696 I found the recipe on Technicolor Kitchen after seeing a photo of it on Tastespotting.  The cake on its own is moist but the homemade caramel that is soaked in makes it even more so.  And, I just love the warmth of the cloves, cinnamon, and fresh grated nutmeg that are added to the batter.

Banana Caramel Cake

Cake:
2 cups (280g) all-purpose flour
1 teaspoon cinnamon
½ teaspoon nutmeg (freshly grated)
¼ teaspoon cloves
1 teaspoon salt
1 teaspoon baking soda
3 large eggs
1 ¼ cups (300ml) vegetable oil (or canola oil as in the original recipe)
1 ¾ cups (350g) sugar
1 tablespoon vanilla extract
¾ cup (75g) coarsely chopped walnuts (omitted)
85g (3oz) dark chocolate, broken into small pieces (size of chips)(omitted)
3 ripe bananas, diced (I pureed them in my mini food processor & mine were small)

Caramel:
½ cup (88g) firmly packed brown sugar
2 tablespoons whole milk
4 tablespoons (56g) unsalted butter, cut into pieces

Butter and flour a tube pan or a bundt pan that can hold 12 cups*; preheat the oven to 180ºC/350ºF. (I used a tube easier for me to get out)
Sift together flour, cinnamon, nutmeg, cloves, salt and baking soda.
In the bowl of a stand mixer, combine the eggs, oil and sugar. With the paddle attachment, mix on medium speed for 2 to 3 minutes.
Scrape down the sides of the bowl to ensure that the sugar has been incorporated. Add the vanilla extract and mix for another 30 seconds. (I added in the pureed bananas)
With the mixer on low speed, add the dry ingredients a bit at a time. Scrape down the sides of the bowl every now and then to ensure everything is incorporated.
Once the dry ingredients have been added, remove the bowl from the stand mixer and add the walnuts, chocolate and bananas. Gently fold them in with a spatula or a wooden spoon. Don’t over mix.
Spoon the batter into the prepared pan. Bake for 50 minutes and then test the cake to see if it’s done by poking a toothpick or cake tester into the centre of the cake. If it comes out clean, it’s done. If not, bake the cake for another 5 to 10 minutes. In Ivonne’s oven, this cake took 55 minutes; in mine, 1 hour. (Mine was done in 45 minutes, I find more often than not everything is done sooner rather than later in my oven.  Adjust accordingly for yours.)
About 5 to 10 minutes before the cake is done, make the caramel by combining all the ingredients in a small pan. Bring to the boil and stir occasionally to ensure that it doesn’t burn. Let it boil for about 5 minutes and then turn off the heat.
Once the cake is out of the oven, poke holes all over the cake with a skewer. Immediately pour the caramel over the cake, stopping every now and then to let the caramel sink in. If the caramel pools in spots, poke more holes to allow it to sink in.
Let the cake cool in the pan on a wire rack. Once it’s cool, loosen the cake from the sides of the pan and then unmold it onto a plate.

DSC01683

The Twins have been out of town playing baseball in Cooperstown, NY since last Saturday which is why you haven’t seen me around.  I thought I would have a break but except for Sunday’s games all of their other games have been broadcast over the internet on the Cooperstown site! Of course that meant instead of having a baseball free week and blogging (& commenting) I’ve been watching and cheering on the boys and their team. 

They just lost making it their last game of the tournament. It was also their third game of the day.  A day which started off with warm ups at the field at 7:30am (after winning and finishing up last night at 9:30pm) in cold rainy weather.  Though they lost they have a lot to be proud of.  Out of a 102 teams they made it to the final four and were seeded third!  Not too shabby.  It’s back to work next week as they have the Elite 24 at Disney in July!  Go Fire!

Technorati Tags: ,,,,

Thursday, June 11, 2009

Ice Cream!

I love ice cream!  I mean, l-o-v-e it! BUT I don't love writing about it or even photographing it.  (It may be harder to do than savory foods.)  For the past several months I've been making ice cream along with the other desserts I've blogged about but have been unmotivated to share my experiences.  I couldn’t tell you how many times I tried writing this post, starting and stopping, starting and stopping.  So, instead of telling about and giving you one recipe I’ve decided to make this a three for one.  :)DSC01253
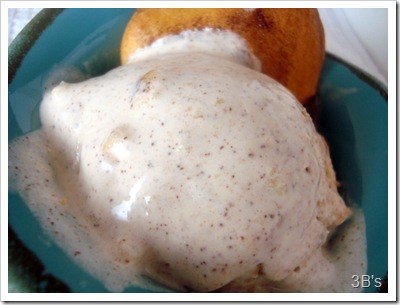
I’m pretty sure you won’t be shocked to read that the first ice cream of the season I made was snickerdoodle ice cream.  I found recipe over at Our Best Bites.  My only changes were to cut back on the cinnamon and use ready made snickerdoodle cookie dough from the store.  A bit of  advice? Make your own cookies or better yet make your own snickerdoodle bars.  :)

 DSC01252

Snickerdoodle Ice Cream

1 1/2 c. 2% milk

1 c. sugar

2 eggs

1 c. heavy cream

1 tsp. vanilla

2 tsp. cinnamon (1 1/2 tsp.)

About 1 1/2-2 c. chopped high-quality sugar cookies, *snickerdoodles, or shortbread cookies

Combine milk and sugar in a medium saucepan.  Heat over medium until bubbles form around the edges.  Remove from heat.

In a small mixing bowl (or really big cereal bowl), whisk eggs thoroughly.  Very slowly, add 1/2 of the hot milk mixture, whisking the eggs constantly.  Return pan with remaining milk mixture to stovetop and then whisk the egg and milk mixture back into the saucepan, whisking constantly.  Add whipping cream.  Over medium-low heat and stirring constantly, continue heating the custard mixture to 160 degrees.  It will start to thicken quickly; remove from heat when your finger leaves a track on a spoon coated in the custard mixture. 

Add in cinnamon and vanilla.  Place the custard in an airtight container and chill in the refrigerator several hours. 

When ready to make ice cream, pour chilled custard into ice cream maker and freeze according to the manufacturer's instructions.  When the ice cream is almost done (like maybe the ice cream maker's struggling a little...it looks like really firm soft-serve...), add chopped cookies.  Remove from ice cream freezer and place in another air-tight container and freeze an hour or two (at least...but not longer than a couple of days) to allow it to firm up.

*I used the grocery store’s ready made snickerdoodle cookie dough but would suggest that you make your own.  They really weren’t that good.


This next one isn't going to be much of a surprise either.  I made banana fosters ice cream which I found on Cafe Johnsonia. The texture of this ice cream wasn’t as smooth or creamy as others and I think it may be due to the homemade caramel that is mixed with the custard but we loved it.  DSC01514

Bananas Foster Ice Cream
1 cup sugar
1/4 cup water
1/2 cup heavy cream (not ice cold)
1 teaspoon freshly squeezed lemon juice
1 teaspoon vanilla extract
2 tablespoons unsalted butter
1/2 tsp. sea salt
2 cups whole or 2% milk (I used 2%)
2 whole eggs or 4 egg yolks (I used 4 egg yokes)
1-2 ripe bananas (depending on how big they are) (I used 2.)
2-4 tablespoons dark rum (optional--can use 1 tsp. rum extract, too.) (I used 1/2 tsp. of rum extract.)

In a 2-quart pan, combine sugar and water. Bring to a boil and cook without stirring until the sugar becomes a deep amber color. Add the heavy cream and stir well. Add the lemon juice, vanilla extract, butter, and salt. (It may clump up, just keep stirring and it will smooth out.)

Transfer caramel to a heat proof bowl to cool.**
Once caramel is cool, whisk in the eggs (or egg yolks).
Prepare an ice bath. (You will need it to quickly cool the hot custard.)

In another pan, heat milk until very hot.** Gradually add the hot milk to the caramel/egg mixture. Whisk well and pour it back into the pan. Cook over medium heat until the custard reaches a temperature of 160 degrees F on an instant read thermometer. Strain the custard through a fine mesh sieve into a clean bowl. Place the bowl in an ice bath to cool.

Peel the bananas, break them into chunks and put them into a blender. Add some of the custard and puree until smooth. (I didn’t puree the bananas.  I just smushed them with the potato masher.) Add the puree back to the bowl with remaining custard. Stir well. Add the rum, if using.

Cover the bowl with plastic wrap and chill until very cold. Freeze in an ice cream maker according to manufacturer directions.
Makes 1 quart.

**Alternatively, you could add the milk to the caramel while it's still hot and then add it to the eggs that have been whisked in a separate bowl. It just depends on how you want to do it. It will work just as well either way. My caramel just happened to be cold, so I added the eggs to the caramel.**

DSC01515

Lindsey has this post on making custard base ice cream which I found very helpful. Per Whitney at Rookie Cookie, Lindsey is Utah’s very own ice cream whisperer.  If you’d like to see another recipe of Lindsey’s I’ve made please visit here.


DSC01289-1

This last recipe is for banana ice cream which I found at Spork or Foon.  (On a side note Teanna is attempting to recreate Top Chef recipes at home which I think is quite impressive!) I really, really liked this recipe which put to good use the overage of ripened bananas that I had on hand at the time.  Best thing?  No cooking!

Banana Ice Cream Recipe:

makes 1 quart

You will need:

2 cups of half and half (I used 1 cup 2%milk & 1 cup of heavy cream)

1 can of sweetened condensed milk

1 cup of heavy cream

1 1/2 teaspoons vanilla extract

2 very ripe bananas

2 teaspoons of fresh lemon juice

Mix together the first four ingredients until combined, making sure the condensed milk is well blended with the other liquids.* Chill until cold.

Pour mixture into an ice cream maker and freeze accordingly.

Mash the bananas with the lemon juice and add to the ice cream maker 2 minutes before it's finished. Transfer ice cream to a freezer safe container, cover and freeze for at least 3 hours.

*I didn’t wait to add the mashed bananas.  I added it into the milk mixture and chilled it as well.

DSC01301