Showing posts with label cream cheese. Show all posts

Sunday, January 16, 2011

Banana Roll w/Cinnamon Cream Cheese

It’s even better than it sounds and it sounds pretty darn good, doesn’t it?!  :) 

banana-roll2

I stumbled across this recipe while looking for another recipe.  (Wanna hear something  funny? I don’t remember what recipe I was originally looking for.   Must not have been a good one. )  The blog I found this on is called Pinch My Salt and the title for the blog post was, “Tired of Banana Bread?  Try this recipe!”  And so I ask you the same thing?  Tired of banana bread?  Make banana roll with cinnamon cream cheese frosting! :)

banana-roll1

I followed the recipe exactly.  My only change was to spice up the filling by adding some cinnamon.  I did have a problem flipping the cake out onto my powdered sugar towel and later trying to roll it up.  It was very tender.  I probably should have cooked it for a minute more. 

Banana Roll, from Pinch My Salt

Cake:
Powdered sugar
3/4 C. all-purpose flour
1/2 t. baking powder
1/2 t. baking soda
1/4 t. salt
3 eggs
1 C sugar
2/3 C. mashed banana (2 medium bananas)

Filling:
1 pkg. (8 oz.) cream cheese, softened
1 C. powdered sugar, sifted
6 T. butter, softened
1 t. vanilla extract

1/4 C. powdered sugar for sprinkling on top (optional)

1. Preheat oven to 375°F. Grease 15×10 inch jelly-roll pan (also known as half sheet pan); line with parchment or waxed paper. Grease and flour paper; set aside. Spread out a clean, thin dish towel on the counter (make sure the towel is larger than your jelly roll pan); sprinkle liberally with powdered sugar (this can be done using a mesh strainer).

2. In a small bowl, whisk together flour, baking powder, baking soda.

3. In a large bowl combine eggs and sugar; beat until thickened. Add banana; beat until well mixed.

4. Stir in flour mixture into egg mixture. Spread batter evenly into prepared pan, easing it carefully to the corners with a spatula.

5. Bake in preheated 375 degree oven for 13 to 15 minutes or until center springs back when lightly touched.

6. Immediately loosen cake from edges of pan; invert cake onto the prepared towel. Remove pan; carefully peel off paper. Roll up cake in towel while hot, starting with 10-inch side. Cool completely on wire rack (will take at least an hour).

7. When the cake is almost completely cooled, make the filling: beat cream cheese, powdered sugar, butter and vanilla extract in small mixer bowl until smooth. (Add some cinnamon to taste to kick it up!)

8. When cake has cooled completely, unroll and spread with filling (or your favorite cream cheese frosting) then re-roll cake. Wrap rolled cake in plastic wrap then refrigerate at least one hour (overnight is best).

9. When ready to serve, unwrap cake and place on a platter. Sprinkle with powdered sugar if desired (sift the sugar through a small mesh strainer for a nice presentation). Cut into slices.

banana-roll-4

banana-roll4

Monday, November 29, 2010

Thanksgiving Desserts

pumpkin-roll

Libby’s Pumpkin Roll

PB-chocolate-brownies

Brownies with PB Chips, Mini PB Cups, & Chocolate PB Ganache

almond-cherry-pie-bars

Cherry Almond Pie Bars

Here are the three desserts I made for Thanksgiving.  They were all very good but the surprise standout was the almond cherry pie bars.   Everyone thought thought they were amazing.  Even those that normally go for the pumpkin or chocolate desserts went back for seconds of the pie bars.  Another plus, besides their overall deliciousness they are also waaaay easier than baking an actual pie!

This recipe comes by way of Amanda’s Cookin’ and her blackberry pie squares recipe.  (If you haven’t yet, check her out.  I’ve made a few of her recipes and have been please with each one.  She also has a pretty cool craft blog. )  I’ve adapted her recipe twice now.  The first time I used Lucky Leaf’s blueberry pie filling and upped the lemon factor by adding the zest of one lemon to the sugar. This time around I used Lucky Leaf’s cherry pie filling and subbed in almond extract for the vanilla. 

Almond Cherry Pie Bars, adapted from Amanda’s Cookin'

Bars:

1 3/4 cups sugar
1 cup unsalted butter (2 sticks), room temp
4 eggs, room temp
1/2 teaspoon pure almond extract
3 cups unbleached all purpose flour
1 1/2 teaspoons baking powder
30 ounces cherry pie filling,* (21 oz. is one can of pie filling but I added another half a can)

Glaze:

1 1/4 cups powdered sugar

1 tablespoon unsalted butter, melted

2 tablespoons heavy cream, enough to make the glaze pourable

1/4 teaspoon of almond extract

almond-cherry-pie-bars1

Preheat oven to 350 F.

Cream sugar and butter in mixer on medium speed until fluffy. Add eggs, one at a time, until incorporated. Add the almond and beat well. Whisk together flour and baking powder. Turn mixer speed down to lowest setting and slowly add flour mixture until completely combined.

Spread half of mixture onto an ungreased 15x10 jelly roll pan. (Amanda weighted hers out.) Spread pie filling over the top of the batter. Drop remaining batter onto the pie filling layer by spoonfuls.  Spread gently.  (I use a damp offset spatula to do this. Don’t worry about it not being perfect.  It all works out.)

Bake for 40-45 minutes or until golden brown. (I took mine out at 38 minutes. Do not under bake. Remove to a wire rack.

Whisk together the powdered sugar, melted butter, and heavy cream.  Drizzle over warm bars. (Toasted almond slices would be nice sprinkled on top.  I didn’t add them because my Dad doesn’t care much for nuts. He’s weird! :))

Allow to cool completely before cutting into squares.

Printable recipe

*Note:

lucky-leaf

I have been very fortunate to receive Lucky Leaf’s pie fillings.  Each one I have tried has been wonderful.  In the past I’ve never cared for the other brands I’ve tried. I found that they were too sweet and artificial tasting.  Not so with Lucky Leaf.  And for those of you staying away from high fructose corn syrup you’ll be happy to hear that Lucky Leaf’s does not contain any!

Disclosure:  While I received Lucky Leaf pie fillings to try.  The opinions expressed here are all my own.


If you haven’t yet, click here to enter my Thankful Giveaway! 


Thursday, November 4, 2010

Pumpkin Cream Cheese Bars

pumpkin-cream-cheese-bars2

Jamie from My Baking Addiction described these as tasting like her nana’s pumpkin roll and while I’ve never tried her nana’s pumpkin roll they didn’t taste like any of the pumpkin rolls I’ve eatened.  They were however still  very good.  Good enough, in fact, for my pumpkin disliking son, Jalen to gobble up two and tell me pumpkin’s not so bad.  :)

Pumpkin Cream Cheese Bars

pumpkin-cream-cheese-bars

Bar

6 tablespoons melted unsalted butter

1/4 teaspoon salt (omit if using salted butter)

1 1/2 cups granulated sugar (288 grams)

2 large eggs

1 cup canned pumpkin (240 grams)

1/3 cup water

1 3/4 cups all-purpose flour (220 grams)

1 tablespoon of pumpkin pie spice*

1 teaspoon vanilla

1 teaspoon baking soda

1/2 teaspoon baking powder

Cream Cheese Layer

8 oz cream cheese, softened
1/4 cup granulated sugar (48 grams)
1/2 teaspoon vanilla
1 large egg

*Pumpkin Pie Spice mix, makes 1 tablespoon

1  1/2 teaspoon ground cinnamon

3/4 teaspoons ground ginger

3/8 teaspoon ground nutmeg

3/8 teaspoon ground allspice

Preparation

1. Preheat oven to 350°. Line a 9 x 13 inch baking pan with non-stick foil or parchment paper and spray with non-stick cooking spray.
2. In a bowl, with an electric mixer on medium speed, beat butter and 1 1/2 cups sugar until smooth. Beat in 2 eggs, pumpkin, 1 teaspoon of vanilla and 1/3 cup water until well blended, scraping down sides of bowl as needed.
3. In another bowl, mix flour, pumpkin pie spice, baking soda, baking powder, and salt; add the dry ingredients into the butter mixture until and combine until well blended. Spread batter evenly into the prepared pan
4. In a bowl, with an electric mixer on medium speed, beat cream cheese, 1 egg, 1/4 cup sugar, and  ½ teaspoon of vanilla until smooth.
5. Drop cream cheese mixture in evenly spaced portions over the pumpkin batter. Pull a knife tip through filling to swirl slightly into batter.
6. Bake in a 350° oven until center of the pumpkin batter (not cream cheese mixture) springs back when touched, about 30 minutes. Let cool completely in pan, then cut into 24 bars.

Printable Recipe

pumpkin-cream-cheese-bars1

~ Notes ~

~ I did not swirl my cream cheese filling directly into the batter.  Here’s how I did things.  I put 2/3 of the pumpkin batter into my pan and spread  the filling over it.  With the balance of the batter I dolloped it over the  cream cheese layer in small amounts and smoothed out as best I could.  After smoothing it out I then dragged a chop stick through the batters to get a swirled effect.

Monday, June 28, 2010

Fruit Pizza

I made this fruit pizza for Father’s Day.  The star of the pizza though was the pineapple curd

DSC03533

And lucky us, we don’t need all pineapple curd that the recipe makes for the pizza, which means leftovers!  Babygirl generously drizzled it over her raspberries. She’s a smart girl. :)

I followed the curd recipe though I did adjust the method a tiny bit.  I’ve made curd several times and used my previous experiences to end up with a smooth and yummy pineapple curd.  The original recipe does not call for straining the curd once cooked.  I did.  I think because the eggs are not tempered they scramble a bit.  Scrambled eggs in curd is NOT yummy so be sure to strain it.  The only other change I made was to sweeten the cream cheese for the pizza.  The pizza recipe only called for lemon juice to be added to the cream cheese but I went ahead and added some powdered sugar.  I thought it needed it.

DSC03536

Pineapple Curd from Myrecipes.com, my changes.

Yield: 2 1/2 cups (serving size: 1 tablespoon)

Ingredients

  • 1/2  cup  sugar
  • 1  tablespoon  cornstarch
  • 1/8  teaspoon  salt
  • 1  cup  pineapple juice
  • 2  tablespoons  fresh lemon juice
  • 3  large eggs, lightly beaten 
  • 2  tablespoons  butter, cut into smaller pieces

Preparation

Combine the first 3 ingredients in a medium, heavy saucepan, stirring with a whisk. Stir in juices and eggs; bring to a boil over medium heat, stirring constantly with a whisk. Reduce heat, and simmer 1 minute or until thick, stirring constantly. Remove from heat; add butter, stirring gently until butter melts.

Strain mixture into medium bowl. Cover with plastic wrap directly touching the top of curd to prevent a skin from developing.  Chill for at least 6 hours or overnight (the mixture will thicken as it cools) in the fridge.

Sunday, June 13, 2010

Babygirl’s Strawberry Topped Cheesy Lemon Pie

DSC03120

This beauty is brought to you by my babygirl.  She not only made the pie by herself, she also took the photos.  ( I edited them in Picasa.)  In keeping with the theme of today’s post I’m going to allow McKenna, aka Babygirl tell you all about her pie.

DSC03124

Hi! This is Babygirl and I really loved this pie that I made.  It was fun and a little easy but it was more fun. Instead of just tossing the berries on top I wanted to make a flower with strawberries. (Well my mommy told me about it and I like the idea so I went with it.) It was hard making the strawberry flower because you have to pick the right strawberry slices. If you want to make the strawberry flower you can find it on Ms. Monica’s blog. If you have any questions send them to my mama and say that they are for me. Thank you. Babygirl out.

DSC03128

Here’s the adapted recipe by Babygirl

 Strawberry Topped Cheesy Lemon Pie, printable recipe

Ingredients:

  • 18 graham cracker squares, crushed
  • 5 tablespoons of unsalted butter, melted
  • 3 TBS granulated sugar
  • 1 lemon, zested & juiced
  • 16 oz cream cheese (2 8 oz blocks) at room temperature
  • 14oz sweetened condensed milk (1 can)
  • Various berries for decoration

Directions:

Preheat oven to 350 degrees.  Place graham cracker crumbs in a medium sized bowl, sprinkle sugar over top, and pour in melted sugar.  Stir well with a wooden spoon.  Once the mixture is even in color place it into a 9 inch pie pan.  Using your fingers pat crust  mixture into place covering the bottom of the pie pan and completely up the sides.  Once the crust has been shape, bake for 6 to 7 minutes.  Remove from the oven and set  on cooling rack. Allow to cool completely. Meanwhile place cream cheese in a medium bowl and beat until smooth.  Add sweetened condensed milk and beat well, about 1 minute. Scrap down sides of bowl and add in lemon zest and juice.  Beat until smooth scraping down sides as needed.  Pour cream mixture into cooled pie crust and smooth out top.  Chill in the fridge at least 3 hours.  After the 3 hours or prior to serving top with fresh berries.

DSC03129

The original un-adapted recipe can be found in William Sonoma’s Sweet Treats.  This is a great book for young kids interested in baking.  Babygirl has successful made 5 or 6 recipes out of it!

**********************************************************

A proud Mommy moment, Babygirl was awarded The Presidential Award for Educational Excellence!  Only 20 out of 99 fifth graders in her school received it!  :) YAY!

Saturday, June 5, 2010

Dessert Table: Lemon Berry Trifle

I’ve actually made this twice since I first saw it on Recipe Girl.  The first time was for Easter and then again for my brother’s dessert table.   It was a hit both times and will definitely be making a repeat appearance.

DSC03349

The first time I made this I used all strawberries and the second time I used a combination of strawberries and blackberries.  I also doubled the recipe for the wedding as I was feeding more people. 

DSC03348

Lemon Berry Trifle, adapted from Recipe Girl                                            (for a printable recipe with my changes click here)

SYRUP:
1/4 cup granulated sugar
¼ cup fresh lemon juice
¼ cup water                                                                                                          (I added the zest of the lemon(s) I  juiced)

LAYERS:
12 oz. pound cake or butter loaf (store bought ok)
8 oz cream cheese, at room temperature
1/3 cup granulated sugar
1 cup cold heavy whipping cream
3 cups fresh blackberries
3 cups fresh strawberries

1. Slice cake into ¾” slices and place on wax paper in a single layer.

2. Prepare lemon syrup: In a small saucepan, bring sugar, lemon juice, zest, and water to a boil over medium heat. Stir to dissolve sugar completely. Let cool, then brush over both sides of each cake slice. Quarter each slice.

2.5 Wash and dry berries well.  Hull and half strawberries if using. I kept the strawberries and blackberries separate because I wanted two distinct layers of berries in my trifle. After prepping the berries I placed them into a bowl and tossed them with half of the left over lemon sugar syrup.

3. Beat cream cheese with sugar on high speed until light and fluffy. Reduce speed to medium and slowly add cream. Continue beating until mixture resembles soft whipped cream.  (I added the last of the lemon sugar syrup.)

4. Arrange half of the cake pieces in the bottom of a glass serving bowl or dish (2 qt. size is sufficient). Spoon half the cream-cheese mixture over the cake in dollops; spread to the sides of the dish. Scatter berry of your choice on top. Repeat layering with cake, cream cheese, and berries.

5. Cover and refrigerate until chilled (about an hour). You may also refrigerate overnight.

Servings: 6-8

Recipe Tips:
*For a lower fat version, try fat-free pound cake and reduced-fat cream cheese.
**You can use any variation of berries.  I’d just make certain to have 6 cups worth.     

This recipe is very forgiving; play around with it and make it yours.  I also think the lemon sugar syrup and cream cheese/whipped cream filling would be great in other recipes. Recipe Girl, has a “how to” video for putting this trifle together.

Sunday, March 7, 2010

We Interrupt Your Normally Scheduled Post to Bring you….

a review and giveaway!  Your nutella marshmallow mousse post will be back next week in it’s normally scheduled spot.  :)  In it’s place we have margarine.  Not any ol’ margarine but I Can’t Believe It’s Not Butter! margarine.

DSC03034

Last month I received an email from Lauren asking if I’d be interested in trying a couple of recipes that called for the margarine, I Can’t Believe It’s Not Butter!.  This was an easy yes.  While I always have butter on hand, there’s also, always a small tub of I Can’t Believe It’s Not Butter! along side it.  In the package I received from Lauren, was a folder with three recipes, a $25 gift card to use toward the purchase of the recipe ingredients, and a lovely serving platter. 

I made two out of three of the recipes. After my recipe reviews you’ll see how you can win the same package allowing you to sample a “Reach Right” recipe.

DSC03064

The first recipe I made was Amaretto Cheesecakes in Pastry Shells.  This recipe was very easy.  The toughest part was not eating the filling while you waited for the shells to cool.  My three kiddos really loved these and with only six puff pastry shells and five of us there was some frantic negotiating  for that last one.  So to keep things fair I ate it.  :)  Kidding! 

DSC03042

The second recipe I made was Honey-Nut Glazed Brie.  This was my favorite.  Love, love, love those nuts!    I actually took this to party that my neighbor was having so my children didn’t get to try it.  I’m pretty certain they would have loved it too.  The brie was gone well before the party was over so I took that as a sign it was good.  The host and hostess thanks me several times for bring it and mentioned how much they enjoyed it.

DSC03059

Both of these recipes will be making a return appearance in my kitchen.   ( I’ve got big plans for those nuts!)Not only were they “Reach Right ” choices but they were both very easy and quick to put together.  Does this mean I’m done with butter?  Uh, no but it is nice to know that I can use my I Can’t Believe It’s Not Butter!  for more than buttering my bread.  :)

feb 24

I Can’t Believe It’s Not Butter! asks you to  “Reach Right” for nutritious tasty food. If you click here you can see  see the fat comparison between I Can’t Believe It’s Not Butter!, Smart Choice, and butter.  While you’re reaching right they also want you to Turn the Tub Around!  You can click here for more info on the Big Fat Truth about spreads and if you’re really feeling the margarine click here to follow I Can’t Believe It’s Not Butter! on twitter! : )

Now for the giveaway info….answer this question.  Which has more trans fat, butter or I Can’t Believe It’s Not Butter!? I will randomly select and announce the winner on Wed. March 17th. 

Please note: This giveaway is being run by me and I am not receiving any monetary compensation for it!  Thanks and good luck!

Saturday, January 9, 2010

Ringing in the New Year with Cinnamon Cream Cheese Pound Cake

DSC02777

Hope everyone had a fantastic New Year!  I did. I started mine off right, with family and cinnamon cream cheese pound cake.   When I first saw this pound cake on Michelle’s blog, One Ordinary Day I knew it was only a matter of time before I baked one up for myself.  I would have actually made it sooner except I couldn’t find the cinnamon ‘n brown sugar cream cheese that she used.  I finally decided to make my own (cream cheese + brown sugar + cinnamon = cinnamon n’ brown sugar cream cheese!) .  I think it worked well.  To allow the flavors to  meld together I made it a week or so in advance. 

DSC02780

Outside of  the cream cheese issue this was a snap to throw together.  I was a bit unsure about the size of my bundt pan so I reserved some of the batter and baked three mini bundts.  After the larger bundt finished baking I realized I didn’t need to be concerned but it worked out well as it left me with the minis to photograph.   My parents who were in town for the holiday season were NOT waiting for me to take photos and the kids are never keen on waiting.  This was a hit with everyone.  My Dad really enjoyed it and said his favorite part was the crunchy crust that formed on the top which once flipped out of the pan became the bottom.  He might have also really liked the glaze! :) 

DSC02786

Cinnamon Cream Cheese Pound Cake

1 1/2 cups (3 sticks) unsalted butter, room temperature

8-oz. Philadelphia Brown Sugar & Cinnamon Spice Swirl cream cheese, room temperature (I made my own)

3 c. granulated sugar

6 large eggs

2 tsp. pure vanilla extract

2 tsp. ground cinnamon

3 c. all-purpose flour

1 tsp. salt

Cinnamon Glaze (recipe follows)

Preheat oven to 325 degrees and lightly spray a 12-cup bundt pan with baking spray, such as Baker’s Joy.

Place butter and cream cheese in mixing bowl and beat on medium speed until smooth.  Add sugar, increase mixer to high speed, and beat for 5 minutes, until mixture is light and airy.  Add eggs, one at a time, beating after each addition.  Add vanilla and cinnamon, then flour and salt all at one time.  Beat just until incorporated.

Pour batter into prepared pan and even out the top.  Bake until cake is golden brown and a cake tester comes out clean, 1 hour and 15 minutes.  Remove cake from oven to a cooling rack.  Cool in pan for 20 minutes.  Remove from pan and allow to cool completely.  Glaze with cinnamon glaze.

Cinnamon Glaze

1 c. powdered sugar (I used 3/4 cup)

2 Tbsp. milk (I used heavy cream)

1/2 tsp. ground cinnamon (I omitted mixing it in.  Instead I grated some on top with McCormick’s cinnamon spice grinder)

Mix ingredients in a small bowl until smooth.  Drizzle over cooled cake. (Because I didn’t use a full cup of powdered sugar and I used heavy cream my glaze was thick.  I had to make a second batch of “glaze” as everyone wanted more for their slice. With my mini bundts I forgot to grate cinnamon on top.)

DSC02790

*You should be able to click on the recipe title to get to a printable recipe page.  Please let me know it it works or not.  I’m trying something new. Thanks!

Tuesday, September 29, 2009

Mini Triple Layer Banana Cake & Finding the Yummiest Cream Cheese Frosting

DSC02112 I made this cake four or five weeks ago when I promised my sitter, Miss Karolyn that I’d make cream cheese frosting (this was the fave) for her mom who was baking 100 banana cupcakes for a baby shower.  Her mom, Beth wasn’t sure what cream cheese frosting tasted like so, I decided to use my brown speckled bananas to bake a  few cupcakes and top them cream cheese frosting for her to try.  I only baked 6 cupcakes and  used the rest of the batter to make a mini three layer cake and three mini bundt cakes (My bundt cakes stuck to the pan, so no photos.).   I also used this opportunity  to try out two new recipes.  I used this lovely layered banana cake recipe and its cream cheese frosting recipe which I found on the blog, Evil Shenanigans.

DSC02133

The cake was great the first day and even better I thought the second.  The frosting on the other hand was good but not great.  Miss Karolyn’s mom who I passed along all the cupcakes to liked both the cupcake and the frosting but I thought I could do better with frosting. 

DSC02122When Miss Karolyn had first asked about the frosting I called my blogging buddy Monica to ask her opinion about how many cups of frosting I would need and to see if she had a recipe to recommend.  She did and I should have listened up and made it from the get go.  I didn’t but luckily I talked to her again and she convinced my I needed her recipe a try.  Oh, my goodness!  It is hands down the yummiest cream cheese frosting I have ever had.  My only issue with it and every cream cheese frosting I’ve ever made is that it doesn’t hold it’s shape or at least mine doesn’t.  It  gets so soft.  Yes, I added powered sugar, as much as I could without over doing it.   Is there some secret I’m missing?  Help! 

DSC02124

Vanilla Bean Frosting from Cupcake Bakeshop

  • 2 sticks (1 cup) unsalted butter, room temperature
  • 1 package (8 ounces) cream cheese
  • 2 teaspoons vanilla extract (I only added a splash as I used  vanilla bean paste)
  • 1/2 vanilla bean, seeds scraped out (I used 1Tbs vanilla bean paste)
  • 4-5 cups powdered sugar (I used 5 cups)

Using an electric mixer, beat the butter at medium speed until creamy. Add the cream cheese and beat until combined. Then add the vanilla extract, vanilla seeds, and 3 cups of powdered sugar and beat at low speed, occasionally stopping to scrape the sides and bottom of the bowl, until light and fluffy. Add more powdered sugar to arrive at the consistency and sweetness you like.

Makes enough to frost 24 cupcakes.

DSC02127

***************************************************

Thanks everyone for all your get well wishes.

If you like fun kitchen gadgets check out this post for a chance to win your own Microplane nutmeg grater.

Thursday, July 9, 2009

Easy Oreo Cake

I saw this easy Oreo Cake a couple of months ago on Dine and Dish and immediately thought of my Dad, Larry.  DSC01749I baked and served it to him the Friday my parents came into town for Father’s Day from NC.  My Dad loved it all but the rest of us had varying opinions.  I personally loved the filling and thought the ganache went well with the cake.  The cake itself while extremely moist and tender was chocolate and as most of you know I’m not a fan nor are my children.  My Mom on the other hand said the cake and filling were great but didn’t care for the ganache which she thought was not sweet enough.

DSC01752

Now I have  to tell you a funny story.  The following day on the request of my mom I took the left over cake to my aunt’s house where a bunch of us were meeting for an impromptu luncheon.  On the way there I had to pick up  the Twins from my brother’s house. Well, when Devon hopped into the car and saw the left over cake he was appalled.  He right away asked me, “Mom, what are you thinking?!  You can’t bring a half eaten cake to a “party”!”  I explained that it was okay but he still thought it odd. He’s a funny kid.

DSC01753

Let me tell you, that half eaten cake was quickly gobbled down and the only negative comment said was that there wasn’t enough for (everyone to have) seconds. My Aunt Toni whose house I was visiting doesn’t generally like sweets and she requested a second slice so she could save it for later! 

Chocolate Covered Oreo Cookie Cake

*This is the recipe as found on Dine and Dish but I’ll be honest, the ingredient list doesn’t make a lot of sense to me.  You see in step #1 it says to “Prepare and bake cake mix in two (9-inch) round cake pans as directed on package”.   I read the backs of both Betty Crocker’s and Duncan Hines’ mixes and the amount of eggs, oil, and water called for on the packages are not the same as the amounts listed in the recipe. Or is it just me that doesn’t get it? If it is me you’re gonna have to break it down for me ‘cause I’ve read and re-read this several times.  My alterations are noted in (red).

1½ hours | 20 min prep

SERVES 16

  • 1 (18 ounce) package devil’s food cake mix
  • 1/4 cup oil (1/2 C. which was the amt the box called for)
  • 2 eggs (3 eggs which was the amt the box called for)
  • (1/3 C. of water, the recipe did not call for any water but the box did)
  • (1 C. of buttermilk, the box actually called for 1 1/3 C. of water but I substituted the buttermilk for part of it)
  • 4 Baker’s semi-sweet chocolate baking squares
  • 1/4 cup butter, cut up
  • 1 (8 ounce) package Philadelphia cream cheese, softened
  • 1/2 cup sugar
  • 2 cups thawed Cool Whip
  • 12 Oreo cookies, coarsely crushed
  1. PREHEAT oven to 350°F Prepare and bake cake mix in two (9-inch) round cake pans as directed on package. Cool in pans 5 minute Invert onto wire racks; remove pans. Cool layers completely.
  2. PLACE chocolate and butter in small microwaveable bowl. Microwave on HIGH 2 minute or until butter is melted. Stir until chocolate is completely melted. Cool 5 minute
  3. BEAT cream cheese and sugar in large bowl with electric mixer on medium speed until well blended. Add the whipped topping and cookie crumbs; mix lightly. Place 1 of the cake layers, top-side down, on serving plate; spread with the cream cheese mixture. Cover with the remaining cake layer, top-side up. Spoon glaze over top of cake. Let stand until set. Store in refrigerator.

DSC01757

Wednesday, July 1, 2009

Raspberry Cream Cheese Buns

I made these the weekend of Mother's Day for my raspberry lovin' Mom who was visiting that weekend from NC. Whenever I see raspberries they make me think of my mom.  So it was a given that these would make an appearance during her visit home after I had seen them on Bake or Break.

DSC01599-1

Both my Mom and Dad loved these!  I thought they were very good as well but I might have gone a little overboard with the jam, dolloping a few more times than the recipe stated to.  :)

Raspberry Cream Cheese Buns

Recipe from The Buttercup Bake Shop Cookbook.

  • 1 cup + 3/4 cup all-purpose flour
  • 1 teaspoon baking soda
  • 1/2 teaspoon baking powder
  • 1/4 teaspoon salt
  • 8 ounces cream cheese, softened
  • 1/2 cup unsalted butter, softened
  • 1 cup granulated sugar
  • 2 large eggs, at room temperature
  • 1/2 teaspoon vanilla extract
  • 1/4 cup milk
  • 1/4 to 1/3 cup raspberry preserves

Preheat oven to 350°. Grease and flour a large (1-cup capacity) 12-cup muffin tin.*

Combine 1 cup flour, baking soda, baking powder, and salt.

Beat cream cheese, butter, and sugar on low speed of an electric mixer until fluffy, about 2-3 minutes. Beat in eggs, one at a time. Mix in vanilla. Add dry ingredients, alternating with milk. Add remaining 3/4 cup flour and mix until combined.

Spoon batter into muffin cups. Top with 3 small dollops of preserves and swirl into the batter using a small knife.

Bake for 20-25 minutes,* or until a pick inserted into the center comes out clean. Do not overbake.

Makes 12 buns.*

*For regular sized muffin tins, decrease baking time by 2-3 minutes. Makes about 20 buns. (I made 18 and had just a wee bit of batter left over.)

DSC01597-1

Don’t ask me why I didn’t pop out one of the buns and take a photo of it and its yummy jam filled belly.  :(

Katie from Salt and Chocolate made a blueberry version of these.

Technorati Tags: ,,

Sunday, May 17, 2009

Lemon Curd & Mascarpone Cream Shots

DSC01447Wanna know how far behind I am on posting?  I made these lemon curd and mascarpone cream shots the day before Easter!  Yea, that far behind! Even after posting this one I'll still have another Easter day treat to share with you.  That one will have to wait as I'm just back into town from the Twins' baseball tourney and decided to wrap this one up.  We lost in the quarterfinals.  You win some you lose some. 

Thanks to everyone for Devon's get well wishes!  The tooth's roots weren't cracked or broken (YAY!) but we're still waiting to see if there is any nerve damage.  I take him on Thursday to see a specialist.  Back to the recipe!  I saw and lusted for this parfait after seeing it on the blog, One Ordinary Day.  She made hers as parfaits but I piped mine into shot glasses.  I didn't get a photo of one totally put together as I put the finishing touches on them at my brother's house but I did take a few photos to show ya.

We loved this!  It was nice and lemony but not over the top.  The cream DSC01436 filling is delish and just lightly sweet.  The original recipe called for vanilla wafers but Michelle used a lemon white chocolate shortbread cookie and I suggest using it over the wafers.  I didn't think I liked lemon and white chocolate together but I do! Now this isn't  the quickest recipe and you know how I am about quick and easy but it was well worth it! I felt a huge sense of satisfaction after making all the components (on their own each is easy) and putting it together. 

Recipe: Lemon Mascarpone Parfait

(adapted from relish)

Cream Filling:

8 oz. mascarpone cheese

6 oz. cream cheese, softened

1/4 c. granulated sugar

1/4 c. sour cream

2 Tbsp. grated lemon zest, to taste

1 tsp. vanilla extract

1 c. heavy cream, whipped

Lemon Curd:

3 eggs

1/3 c. freshly squeezed lemon juice (I used Meyer lemons)

3/4 c. granulated sugar

4 Tbsp. unsalted butter, cut into small pieces and room temperature

1 Tbsp. grated lemon zest (I used Meyer lemons)

Crumbs:

24 lemon white chocolate shortbread cookies (available at Target)(Their the target brand)

(Optional garnish:  (1) 1 oz square of Bakers chocolate, lemon zest, and cookie pieces)

To prepare the curd, whisk eggs, lemon juice, sugar, butter and lemon zest in a stainless steel bowl over a pot of simmering water.  Cook, whisking constantly, for 10 minutes or until thick.  Remove from heat and strain if necessary to remove any lumps.  (I mixed in some lemon zest I had leftover) Lay plastic wrap on the surface of the curd and bring to room temperature.

Whip heavy cream.  (I find it’s quick and easy to do this when I place my mixing bowl in a larger bowl full of ice. (I set my bowl of heavy cream and  the hand mixer whisk in the freezer while I'm setting everything else up) )To prepare the cream filling, beat mascarpone, cream cheese, sugar, sour cream, lemon zest, and vanilla in a large mixing bowl until smooth.  ( I did this while Gently fold in whipped cream.

To prepare the crumbs, place cookies in a food processor and pulse until fine.  (I lightly crushed mine by hand.)

Layer the cookie crumbs, cream filling, and lemon curd in parfait glasses or in a trifle dish.  Top with sweetened whipped cream, if desired. (I didn't add the additional whipped cream later and my layers went like this cookie pieces, lemon curd, and mascarpone cream.  I garnished them with cookie pieces, lemon zest, and white chocolate curls.  As I mentioned earlier except for the cookie layer I piped in the curd and cream layers.  It made things much neater. To make the tiny white chocolate curls I microwaved the square for 1o seconds to soften and used my vegetable peeler to "peel" the chocolate.)

DSC01453

Wednesday, April 8, 2009

Look familiar?

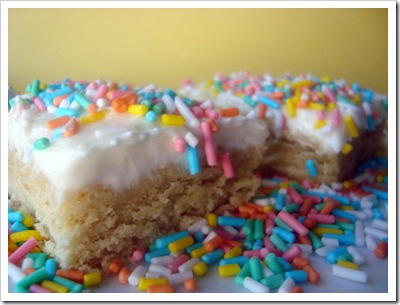
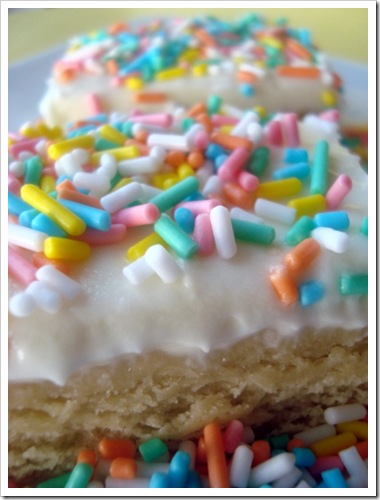
DSC01260 These yummy sugar cookie bars might look familiar as they've been making the rounds lately.  I originally saw them on the blog One Ordinary Day, then on The Repressed Pastry Chef, and AGAIN on My Baking Addiction

DSC01261

I had printed out the recipe from One Ordinary Day when I first saw them there and had every intention of making them but one of the Twins' teachers had something else in mind when she requested a treat for her class.  So they were pushed to the side for another day.  After seeing these pop up and raved about on two more awesome blogs I couldn't put them off any longer. 

DSC01262

I'm not crazy about sugar cookies but I am crazy about these.  They really are all they are hyped to be. Blondies and Snickerdoodle ones are still my favorite but these are an excellent alternative. 

DSC01271

I was worried that they might be overly sweet so I cut back on the sugar (about a 1/4 cup) but after tasting the bars I  think next time  add the full amount. I topped my bars with cream cheese frosting and sprinkles but had intended to frost only half of the pan with it and the other half with Em's Buttercream Dream Icing.  I didn't softened enough sticks of butter, grrrr, so I was forced to frost the whole thing with the cream cheese frosting. The  recipe is from Simply Recipes and is the one I used to top my red velvet cupcakes.

DSC01273

If you haven't already please hop over to this post to leave me your opinion and enter my giveaway.

Sunday, March 15, 2009

It's not about the cake but the frosting!

This is all about the frosting and this frosting is too  good to not pass  along.  Some of you may be like, duh, Ingrid where have you been and others, hopefully one, will be like, hey, thanks!  :-) I found this  caramel frosting recipe on Erin's Food Files.  (Check out her candy coated marshmallow heart pops.)

r2

I had a layer of banana cake in the freezer that needed to be used from when I made this cake.  When I froze that sucker and even before tasting it I knew I wanted something caramel-y. 

Don't make the cake but do make the frosting. It was actually pretty easy and just a little time consuming.  You make your own caramel sauce (yay,me) and use it in the frosting which is a cream cheese buttercream concoction.  Did I mention it's goooood? No? I'm talking GOOD!  I thought I didn't like caramel growing up then I started blogging and realized, oh, what I don't like is that yuckiness they put into jars and label caramel sauce.  After making my own it's been confirmed I LOVE homemade caramel sauce and Julia, you're right this is even better than those caramels you unwrap and melt down with cream or whatever.  I know better now.

DSC01140I  "frosted" the middle layer with caramel sauce then once it set up I added the caramel cream cheese buttercream. For top I  drizzled caramel sauce on it.  Everyone who had a slice only talked about the frosting an even my nonfrosting loving son said that it was great.  Yeah, make the frosting forget the cake!

On a side note I just finished the book Emma & Me by Elizabeth Flock.  I really enjoyed it.  Lately I haven't had much luck at the book store.  I can't seem to find anything that makes me want to stop what I'm doing and read!  Emma & Me was really good and I didn't even guess the end until the end which I really liked.  It's tiresome when midway through a book and you already have it all worked out.  I'm moving on to Wally Lamb's  She Comes Undone my friend, Wendy suggested it to me. Anybody else read it? Recommend it? Or anything else? 

Okay, just one more thing.  A few people have asked where did I purchase my cake stand.  I purchased it at Target on clearance for 5 or 6 dollars. 

That first photo is courtesy of Miss Karolyn.