Wednesday, May 6, 2009

Em's Hybrid Lemon Bars

DSC01532 For those who may not know...Em is the lady behind the wonderful blog The Repressed Pastry Chef.  Em is a huge fan of lemons but others (Jamie) call her obsessed. :) A few weeks ago Em posted this recipe and this recipe. Each one was very good in it's own separate way.  Em claimed that the first recipe's shortbread crust was one of the yummiest and the second recipe's filling was near perfect though not (in her opinion) tart enough.  Leaving a her a comment asking for her opinion on which was the best one to make she suggested the brilliant idea of combining the best of each recipe.  Along with her suggestion she also mentioned cutting back on the sugar in the filling.  Because I, too like my lemon bars tart and tangy I went ahead and cut back on the sugar. I'm very happy to say these bars were terrific!  They'll definitely make you pucker up but in a good way. Not overly so but I did think that the sprinkling of powdered sugar on top complimented it nicely.  Usually I prefer mine with it out.  If you like a milder lemon taste  just follow the recipe and use the full amount of sugar.

DSC01529

Around the same time I was whipping up these bars so was Jamie.  Please hop over and check out hers.  I love how she always adds sprigs of mint leaves to her dessert giving 'em that little something extra.  Be sure to check out the original recipes at Em's.

Em's Hybrid Lemon Bars

Makes about two dozen 1-1/2 to 2-inch squares

Ingredients

--The Crust--
1 3/4 cups all-purpose flour
2/3 cup confectioners’ sugar -- plus extra to
decorate finished bars
1/4 cup cornstarch
3/4 teaspoon salt
12 tablespoons unsalted butter -- (1 1/2 sticks) at
very cool room temperature, cut into
1-inch pieces, plus extra for greasing pan

--Crust Directions--

1. For the crust: Adjust oven rack to middle position and heat oven to 350 degrees. Lightly butter a 13-by-9-inch baking dish and line with one sheet parchment or wax paper. Dot paper with butter, then lay second sheet crosswise over it. (I used Reynolds nonstick aluminum foil and lightly sprayed it with Pam.)
2. Pulse flour, confectioners’ sugar, cornstarch, and salt in food processor work bowl fitted with steel blade. Add butter and process to blend, 8 to 10 seconds, then pulse until mixture is pale yellow and resembles coarse meal, about three 1-second bursts. (To do this by hand, mix flour, confectioners’ sugar, cornstarch, and salt in medium bowl. Freeze butter and grate it on large holes of box grater into flour mixture. Toss butter pieces to coat. Rub pieces between your fingers for a minute, until flour turns pale yellow and coarse.) Sprinkle mixture into lined pan and press firmly with fingers into even, 1/4-inch layer over entire pan bottom and about 1/2 inch up sides. Refrigerate for 30 minutes, then bake until golden brown, about 20 minutes. (I baked mine for less as I noticed it was already golden brown and smelling heavenly after the 15 min mark, so I took it out.)

Ingredients

--Filling--

  • 6 extra-large eggs at room temperature (I used 6 large eggs) 
  • 3 cups granulated sugar (I only used 2 cups)
  • 2 tablespoons grated lemon zest (4 to 6 lemons) (I used 3 regular lemons & 3 Meyer)
  • 1 cup freshly squeezed lemon juice (I used 3 regular lemons & 3 Meyer)
  • 1 cup flour
  • Confectioners' sugar, for dusting

--Filling Directions--

For the filling, whisk together the eggs, sugar, lemon zest, lemon juice, and flour. Pour over the crust and bake for 30 to 35 minutes, until the filling is set. Let cool to room temperature.  Sprinkle generously with confectioners' sugar and cut.

Note:  I don't know if the filling is normally very "watery" when the recipe is followed (exactly) but mine was.  When I noticed how much I was really worried but it worked out fine. 

Technorati Tags: ,

Sunday, May 3, 2009

Angel Cake

DSC01563

This Angel Cake almost didn't happen. As a matter of fact this is the second cake that was chosen by Charity and I's two person baking group.  The first cake we chose was Baked's Snowball cupcakes which are coconut cupcakes filled with coconut cream and topped with a coconut cooked flour frosting. This was my choice.  Sounds good doesn't it but we just couldn't get excited enough about it to get around to making it, maybe next time.  With that cake by the wayside I decided to bypass my turn and let Charity chose the next cake. Charity chose an Angel Cake from the Joy of Cooking.  If you're here from Charity's blog or already ready her post you'll have read that she had issues finding an aluminum tube pan.  Six stores later and still no pan.  Determined to make this cake she finally caved and bought a nonstick one.   Me? I've had a tube pan that I purchased some time ago but never used. I'm finally gonna get to break that sucker in but wait! Charity has mentioned in her emails that she can NOT find a nonstick one.  Hmm, yeah. It got me thinkin'.  Could mine be nonstick?  Uh, yeah. It's nonstick.  Well, I learned from Charity that the aluminum ones are hard to come by if you don't order it online so I just used my nonstick one and prayed that it worked ok.  I think it worked but here's the thing I'm not sure how tall the cake should have been.  Mine only rose to three inches but unlike Charity's mine never sank.  I've never tasted homemade Angel Cake before so I'm not sure if this is what it's supposed to taste like but I do know it tastes waaaaaaaaaaaay better than any store bought or boxed one I ever tasted.  I loved this cake.  Based on my prior experiences with Angel Cake I was prepared to not like it.  I figured like the store bought kind it would need something , berries, whipped cream but it didn't and it's a "healthy" cake! Because I was already behind the eight ball with the pan I went ahead and just made the plain one but I'm going to try some of the other flavors.  There's even a candy bar one! 

DSC01575

Please, hop over to Charity's to see how she faired with her cakeDSC01570 and get the recipe.  She also has some helpful tips. If you like Angel Cake give it a try.  I actually thought it was pretty easy and much better than any store bought one or mix.  The toughest part for me was flipping that hot tube pan over without burning myself or dropping it on the floor.

Technorati Tags: ,

Friday, May 1, 2009

And the winner is

DSC01540

Noodlegirl!  Congratulations Noodlegirl!  Thanks everyone for your responses.  Here's what I learned.....you would rather I post the recipe with my adaptations and provide you with a link back to the blog that inspired me to try the recipe.

Technorati Tags: ,

Thursday, April 30, 2009

Last hour or so............

Just wanted to remind you that you only have until midnight Eastern Standard time today to answer my question and enter my giveaway. Good luck and thanks!

Sunday, April 26, 2009

Pizzookies?

DSC01353In keeping with my current theme of fast and easy here's  another "recipe" that falls right into that category!

I saw this over at Our Best Bites about a month ago and have made it several times.

It's more a method than a recipe.

DSC01339

DSC01340  DSC01344   DSC01344DSC01345


Pizzookies

  • Cookies dough (any flavor, homemade or store bought)
  • Ice cream (any flavor, homemade or store bought)
  • hot fudge or chocolate sauce (homemade or store bought)
  • caramel or butterscotch sauce (homemade or store bought)
  • toasted nuts, sprinkles or chocolate chips
  • whipped cream

Preheat oven to 350. Fill ramekins about 1/2 full of cookie dough. Bake in preheated oven for about 12-14 minutes or until golden around the edges but still soft in the middle.Remove from oven and allow to cool about 5 minutes. Top with a scoop of ice cream and drizzle with caramel and chocolate sauces.

Each time I've made these I only made a few and went with chocolate chip cookie dough and vanilla ice cream.  I did add caramel and chocolate sauce to Jalen's but left everyone else's plain. This is one of those rare desserts where you CAN make everyone happy.

Good news, the boys baseball team came out on top this weekend.  They won USSSA's 13:U Battle of the Bats tournament!  The whole team did battled all weekend long as three out of four games went down to the wire!  Go sting!

Please remember in order to enter my giveaway you need to answer this question.

Friday, April 24, 2009

Monkey Bread Muffins

A couple of weeks ago Maria from Two Peas and Their Pod made these muffins for her hubby and if you remember this post you're not surprised I had to give these a try.  These were (are!) sooooo good.  Yes, they use *gasp* refrigerated dough but you know what?  I'm totally okay with that.  (sorry Maria :)) 

DSC01466

I've eaten and made monkey bread many times and used various recipes but this is my new favorite!  It probably has something to do with the fact that each muffins is covered in a generous amount of yummy caramel.  :) I also like the individual servings, mini monkey bread! 

DSC01470

Here's Maria's recipe .  I made my muffins a little different and have noted it in (red).

Monkey Bread Muffins

4 cans of refrigerated biscuits, I used Pillsbury (I only used 1 ten count can. You could certainly use homemade biscuit dough or whatever brand/type you want.)

Cinnamon (be generous, cinnamon is your friend)

Sugar (I have a cinnamon sugar shaker so I used it)

1 stick of butter (I used salted)

1 cup of brown sugar

1. Preheat the oven to 350 degrees. Spray a muffin tin with cooking spray. (Be sure to spray the top of the muffin pan as the caramel mixture bubbles up and over.)

2. Cut the biscuits in half and roll the dough into little balls. (I cut mine into quarters and didn't roll them)

3. Combine the cinnamon and sugar. I use extra cinnamon:) Roll the balls in the mixture.  (I tossed the dough into a bowl and generously sprinkled cinnamon sugar over it.  Toss well to make certain the dough is adequately covered with the cinnamon sugar.)

4. Place four balls in one muffin cup. Fill the pan.  (In all but three of the muffins before placing the dough I added some chopped pecans and then filled the cup with four pieces of dough.)

5. Melt the butter and brown sugar in a small pot on the stove. Stir until melted and bubbly.  (You could use a different "caramel" recipe, store bought, or melt down those caramel candies (sorry, Julia) but I suggest just using this one; works fine, taste good!)

6. Pour the gooey sauce over the muffins. (I made the whole caramel recipe yet only made 10 muffins so, I saved a little bit for another use.  I also topped the dough that had pecans on the bottom with more pecans.  Besides the pecans you could add in chocolate chips or in my case cinnamon ones. )

7. Bake for 10-12 minutes. (I checked mine at 10 but they weren't done.  Though I did notice that some of the caramel mixture was precariously close to bubbling over the pan's edge and onto my oven floor so I hurriedly put the muffin pan onto a cookie sheet and baked for about 5 more minutes.)

8. Cool for a minute in pan. Remove muffins from pan and enjoy. (With my one can of biscuits I made 10 muffins which was perfect for my family of five but you could certainly use a smaller can of biscuits or as many cans as you'd like.  Just adjust the recipe accordingly.  This recipe is very forgiving!)

**If you don't want to make muffins, you can do a big monkey bread loaf in a bundt pan. Just layer the balls and pour the gooey sauce over them. It will take longer to bake, 35-40 minutes.**

DSC01473

Joe thinks everything is better with vanilla ice cream so he added some to his muffin.  Speaking of ice cream..... I've got a mega ice cream post I'm working on.  Stay tuned!  :)

Awhile back I made Maria's cinnamon syrup but unfortunately I didn't get any photos.  I kept thinking I'd make another batch and take some pics but it hasn't happened. I made the syrup for the kids to top their school morning Eggo waffles.  It was a hit and a nice change from their Hungry Jack syrup.  The recipe doesn't say but it will keep in the fridge for about a week.

Answer this question and enter my two book giveaway!

Monday, April 20, 2009

S'mores Bread Pudding

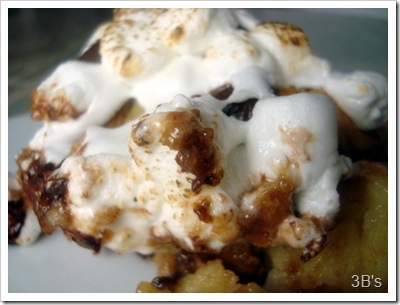
DSC01381When you have bread going stale what do you make?  Why bread  pudding of course!  And if you're me S'mores bread pudding to be exact! :)

I remembered drooling over Peabody's photos of her S'mores Bread Pudding awhile back and new this was the perfect opportunity to give it a go. 

DSC01385 

I checked out the recipe since it had been a while and I couldn't  find the printout in the stack of ten thousand sheets I have lying in a mountainous pile.What I found after checking the recipe was that she used a Hot Chocolate bread.  Well, I wasn't making one and the whole point of the bread pudding was to use up my leftover baguette.  Not to be deterred I decided to adapt the recipe to suit my purpose and taste.  I think I did pretty good though I'm sure had I followed her recipe I would have also been happy. 

S’mores Bread Pudding (my adaptations in red)

1 Guatemalan Hot Chocolate Bread (recipe follows)- cut up into square pieces (I used 1 loaf of french bread.)

1 ½ cups heavy whipping cream
½ cup whole milk  (I used 2%)
2/3 cup granulated sugar
3 egg yolks
1 egg
1 tsp vanilla extract

10 graham crackers
¾ cup mini chocolate chips (semi-sweet Guittard chocolate chips)
2 cups marshmallows (give or take, the amount is really up to you, I used minis)

Butter a 8-x-8-inch pan.  (1 souffle dish)
Whisk together the heavy whipping cream, milk, sugar, egg yolks, egg and vanilla extract. Set aside, this is the custard mixture.  (I cut up my baguette and added it to the custard mixture.   I left the bread soaking in the custard and stirred it occasionally until most of the custard was soaked up by the bread.)
Sprinkle bread pieces on the bottom of the pan so that the pan is covered. (I layered the custard soaked bread, graham crackers, mini marshmallows, and chocolate chips in the souffle dish.  One layer of bread pudding, one layer of graham cracker, liberally sprinkled with mini marshmallows,chocolate chips, and another layer of bread pudding followed by the graham crackers.)  Break graham crackers in to pieces (I keep mine in whole pieces. Just breaking off pieces to fit my dish.) and sprinkle evenly half of them on top of the bread. Sprinkle evenly half of the chocolate chips as well. Add 1/3 of the custard mixture and press bread down so that the custard soaks in. You may need more custard depending on how dry your bread is. Then add bread pieces again, followed by remaining graham crackers and chocolate chips. Add another 1/3 of the custard mixture and again press the bread down to make sure all the bread pieces get soaked with custard. Keep adding the custard until all of the piece are soak through with custard. You will most likely have both bread pieces and custard left over (I didn't have any of either leftover), feel free to make a mini one.
Place dish in a water bath and bake at 350F for 1 hour. After the first 20 minutes, place aluminum foil on top of the bread pudding to prevent the graham cracker pieces and top of the bread from browning too much.
When the bread pudding comes out of the oven, immediately (I added more chocolate chips and then the marshmallows) spread marshmallows on top to allow them to melt. You can use a kitchen torch (Joe used our kitchen torch) or place under a broiler to get the toasted marshmallow look. Top with chocolate syrup (The kids and I don't do a lot of chocolate so we left off the syrup.) and serve warm (or hot or cold for me).

DSC01387The sitter, Miss Karolyn and the twins really liked the it.  Babygirl was too slow so she missed out.  Devon, my unofficial taste tester said it was good but that the Bananas Foster one was better.  (I think it was the Bananas Foster sauce that put it over the edge!) I admit to liking this better after it cooled substantially. When I first tasted it still warm (hot) from the oven I didn't like how "wet" the bread still was  (I DO NOT like mushy, soggy  textures! EW!) but after it cooled to room temperature it was perfect, moist with a yummy custardy flavor but not soggy.

DSC01393

I broke out my new kitchen torch and (finally) used it or rather Joe did to toast the marshmallows.  I was a little timid and kept worrying we'd burn the house down or at least each other.  He did a good job.  Did ya see all those lovely toasted marshmallows?

DSC01397

**Please let me know if I missed something in the recipe or if I didn't explain myself well.

Don't forget to answer my question with your opinion and enter my giveaway!

Thursday, April 16, 2009

S'mores Brownies two ways

I'm sure it's not a shock to read that I love s'mores (desserts).  Here's the crazy thing, I've never had an actual s'mores. You know,  everyone's fave campfire treat, the kind with the marshmallows roasted over an open fire. I've made toaster oven s'mores and many other s'mores like desserts but never the real deal.

DSC01150

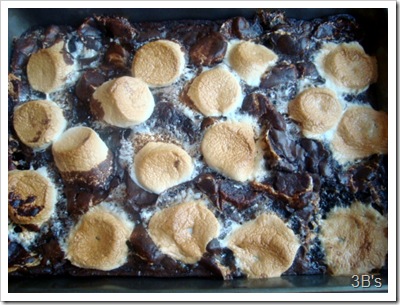
These first S'mores Brownies were pretty good and were made using a boxed brownie mix. Unfortunately I overcooked the brownies and thus the graham cracker crust a bit.  The brownies sit atop a  graham cracker crust and  its crowning glory is a yummy layer of oven melted marshmallows.  Sandwiched between the two (should have been) a gooey fudgy brownie. Sounds good right? So you know I was bummed when I sampled one and found my brownies were not gooey or fudgy. 

DSC01161

I made these for Devon, one of the twins to take to school along with a pan of white chocolate blondies but because they didn't turn out as well as I wanted I didn't send them. Against my better judgement Devon convinced me to send in two for his teacher to try.  (He came back with the message....she liked them!) I didn't follow a recipe just an idea of what I wanted.  

DSC01474

The second S'mores Brownies I made were inspired by the ones I saw on the blog, Joy the Baker.  Being that the Twins had baseball practice and it was moved indoors I figured I would take the brownies to practice but after taking them out of the oven I realized that they would be a bit messing to cut and serve.  I took the recipe's concept of adding marshmallows and graham cracker pieces into the batter to make it "smores" and instead of making homemade brownies I used a box mix.  (Original recipe provided below) I did add a bit more marshmallows and graham cracker pieces which lead to their being a tad difficult to cut.  While I liked these, especially warmed up and topped with vanilla ice cream, I wasn't crazy about them.   I've come to realize while the concept of a s'mores brownies is a good one it doesn't translate well.  In both of these the brownie was the dominant taste. Don't get me wrong some (brownie lovers) might enjoy both of these  but for me s'mores are more about the gooey marshmallows and graham crackers than the chocolate.  If you want something that is reminiscent of those yummy campfire treats give these a S'mores Bars or even these.

DSC01477

S’mores Brownies

     adapted from Bon Appetit, October 1991

  • 1 1/2 cups all purpose flour
  • 2 teaspoons baking powder
  • 1 teaspoon salt
  • 1 cup (2 sticks) unsalted butter
  • 6 ounces unsweetened chocolate, chopped
  • 5 large eggs
  • 1 1/4 cups dark brown sugar
  • 1 cup granulated sugar
  • 2 teaspoons vanilla
  • 1 cup graham cracker, roughly crushed with your hands
  • 12 big marshmallows  (I also diced 6 additional marshmallows and stirred them into the batter. These marshmallows dissolve when baked, so you can leave them out, or throw them in.  Up to you!)

Preheat oven to 350°F. Butter 9×13-inch baking pan with 2-inch-high sides. Combine first 3 ingredients in small bowl. Stir butter and chocolate in a medium sized bowl over a  heavy  saucepan of simmering water.  Stir chocolate and butter in this double boiler until melted and smooth.

Beat eggs, sugar and vanilla in large bowl to blend. Stir in warm chocolate mixture, then dry ingredients. Fold in graham crackers.  Pour batter into prepared pan. Dot with 12 large marshmallows.  Bake until toothpick inserted into center comes out with moist crumbs attached, about 30- 40 minutes minutes.

Marshmallows will be browned and puffy but will deflate as the brownies cool.  Cool for at least 20 minutes than slice with a sharp knife, cleaning the knife with hot water if it gets too messy and sticky.  Serve or wrap individually in wax paper for storing.

Answer this question to enter this giveaway.